
When you buy something using the links on our posts, we may earn a small commission at no additional cost to you. Learn more.
Do you want to learn how to make your own nursing shadow box? Thanks to our recent story on inspiring nursing shadow box pins on Pinterest, we received questions on how to DIY shadow boxes.
But before we dive right into the tutorial, did you know that shadow boxes originated with sailors?
A long time ago, sailors had a superstition that if their shadow touched the shore before actually setting foot upon it, they would suffer bad luck. To keep this from happening, a sailor would put his possessions inside a simple storage box. It would stand for a metaphorical shadow of himself so that the sailor would always touch land before his “shadow”.
Later on, shadow boxes were also adopted in the military. Military personnel were presented shadow boxes upon retirement. The tray from the trunk that usually accompanied them during their travels is usually lifted out and used to store and display service memorabilia, letters, and photographs.
Today, anybody can create their own shadow box. Shadow boxes are used to store and display precious memories and achievements.
Here are some reasons for you to create a nursing shadow box:
- To commemorate graduation from nursing school
- To remember close friends and colleagues in a hospital you worked in
- To create an inspirational and motivational board on the profession you’ve chosen
- To gift to a really close BFF nurse friend who is retiring or moving away
- To make a display case of achievements received from school or work, including nursing certifications
- To make a list of countries or places you want to work in as a travel nurse
There’s plenty more reasons to make shadow boxes. And they’re very easy to make too. Here’s how…
PLANNING YOUR NURSING SHADOW BOX
A shadow box is tied up to a central idea or theme. Most nursing shadow boxes celebrate one’s graduation from nursing school. But, you can create shadow boxes about anything and be as creative as you want to be.
So first off, decide what your shadow box will be about. Next, collect all the stuff that will go into your shadow box. If you’ve already chosen a theme, you most likely already have a collection of mementos that can go into your shadow box.
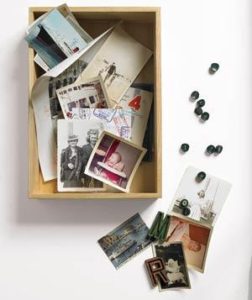
As seen in our previous articles, some shadow boxes contain all the memorabilia from graduation. Some contain mostly photos. Some featured miniatures. Some others mix it up with objects, photos, letters, newspaper clippings, and so on.
Next, arrange these items you’ve chosen as you would in a display box. Knowing how much stuff you have will actually tell you how small or big your shadow box is going to be.
MAKING YOUR DISPLAY BOX
Once you’ve gathered all your mementos in one place, it’s time to decide the material for your shadow box. For wooden display boxes, you can choose from the following options:
1. Use an old drawer.
Find an old drawer lying around in your house or in a garage sale. You can even repaint it if you want a shabby vintage look. If you want to keep dust from accumulating on the contents of the shadow box, tape a transparent film or plastic onto the top.
2. Buy a ready-made shadow box.
You can buy ready-made shadow boxes from craft stores or even online stores. Check this classic and simple shadow box with high ratings.
This shadow box has different-sized apertures.
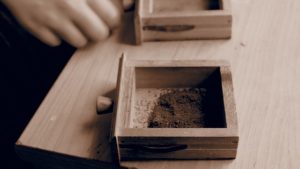
3. Build your own display box.
If you have serious woodworking skills (or have a friend or family member who has them), you can build your own shadow display frame.
Below is a video you can check out on how to build your own display case. Warning: If you’re all thumbs, you might want to stay away from this video.
If you have no power tools but enjoy crafts, this next video might be more for you. This video tutorial will teach you how to make a regular picture frame into a shadow box frame using only regular tools like glue, a ruler, and scissors. Awesome, right?
Now, if you don’t want or can’t use a wooden frame, you can use a much simpler material – cardboard. You can make a shadow box frame using a cardboard box. See the tutorial HERE.
PUTTING YOUR NURSING SHADOW BOX TOGETHER
Now that you have your display box ready, it’s just a matter of assembling all your mementos and making the best (and most creative) presentation. Depending on the material and display case that you used, you can use pins, paste, glue, or a glue gun to keep your stuff where they should be. You can even use needle and thread to sew objects to the backing of the display box.
Here are some shadow box tips to add zing to your project:
- Add colorful labels and text
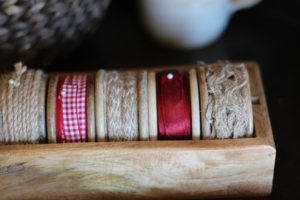
- Recycle or visit the craft shop for cute ribbons, buttons, stationary, lace, and cloth
- Make cute drawings using colored pens or pencils
- Add glitter or sparkly accessories if you like bling
- Use washi tape
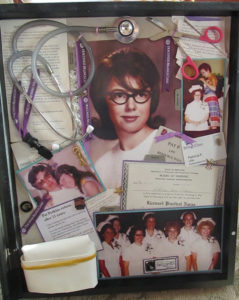
Need to check out some good examples of nursing shadow boxes? Here is Nurse Pat’s retirement shadow box which we featured before. It holds all of Nurse Pat’s actual equipment, some of which she has been using since the start of her career.
And here is a really cute non-nursing shadow box that shows just how creative you can get:

Now it’s your turn. Whatever you put together, it will surely be appreciated by friends and family who will see your finished project. And if you make it sturdy enough, your children and your children’s children will also see your nursing shadow box and learn about your stories.
Have fun! Visit us anytime in our FB page.


