Most nurses get nervous when starting IV lines on patients and that’s completely understandable.
You see, no matter how pro you think you are in starting an IV line, a blown vein can still happen. And when it does happen, your patient isn’t the only person who’ll feel uneasy; you’ll probably feel distressed and distracted throughout your shift, too.
To help you out, here’s a handy guide to everything you need to know about successful IV insertion.
Why Do Veins Blow?
There are many possible causes why veins blow during a routine IV catheter insertion. Here are some of them:
- Fragile veins
Some people are born with weak vein walls. There are also some specific age groups that are more prone to developing fragile veins.
Geriatric patients, for example, normally have weak vein walls due to age-related degeneration of connective tissues. Pediatric patients may also have weak vein walls as their veins are still too small.
See Also: How To Perform IV Insertion On Very Fragile Veins – 5 Essential Tips for Nurses
- Movable veins
There are some veins that are highly movable, especially when you try to puncture them. Usually, the cephalic vein is the most movable one that you’ll encounter. The dorsal venous network in the hands of most geriatric patients is also thick and movable.
- The catheter is too large
A large-bore catheter used on a small vein will cause vein collapse. To prevent that, make sure to assess your patient’s vein first so you can find a suitable IV catheter.
Now that you know some of the most common causes of blown veins, here are our best tips to help you succeed in your next IV insertion.
1Feel the veins
You can’t easily see a good vein but you will definitely feel it by palpating the area. Feel for its fullness and integrity. Choose the largest vein first as you will less likely blow it, especially if you’ll be using a large-bore catheter.
2Choose the right catheter size
Needle size is important.
If you don’t need to infuse large volumes of fluid or if a blood transfusion is not necessary, you can just use a small catheter.
For adult patients, however, gauge 22 is usually recommended. On the other hand, gauge 22-26 IV catheters are commonly used for pediatric patients.
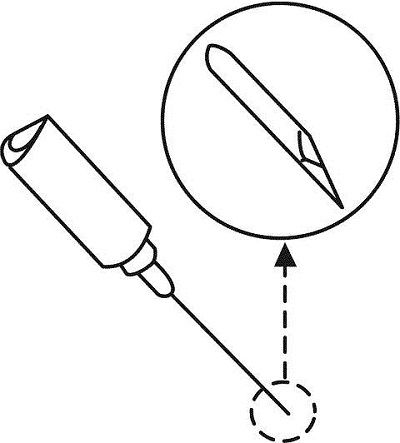
3Make sure that the bevel is facing upwards

You can control the angle of insertion more when the bevel is facing upwards. You will also have an easier point of entry as the sharp end-tip of the needle enters the skin.
4Choose a deeper vein for geriatric patients
Elderly patients usually have fragile veins, like those in the dorsal part of their hands. If you know that you are dealing with a fragile vein on an elderly patient, look for deeper veins that are more stable and less movable.
5Always go for the straightest vein
Venous valves are often located at the intersection of two veins. For a smooth IV line insertion, you may want to avoid that area.
If you encounter venous valves upon catheter insertion, they will stop the needle from advancing forward, forcing it to puncture the vein wall sideways.
See Also: 35 IV Therapy Tips and Tricks for Nurses
6Use hot packs if your patient’s arms are cold
If your patient’s arms are cold, you need to warm them up to dilate the blood vessels. By doing this, you can make veins pop out quickly.
You can use warm washcloths or a blanket if you don’t have hot packs in your area.
7Ask your patient to open and close his/her fist during vein assessment
This will improve venous refill, especially if the arm is dangling downward. Also, when you are about to do a venipuncture, make sure to ask the patient to keep his/her hands and arms relaxed.
Improving venous refill will enable you to see the veins clearly and assess which vein is more prone to blowing.
8Anchor the vein
You can do this by holding the skin and veins taut with your non-dominant hand. With this technique, you can keep an unstable vein from moving sideways as you puncture it.
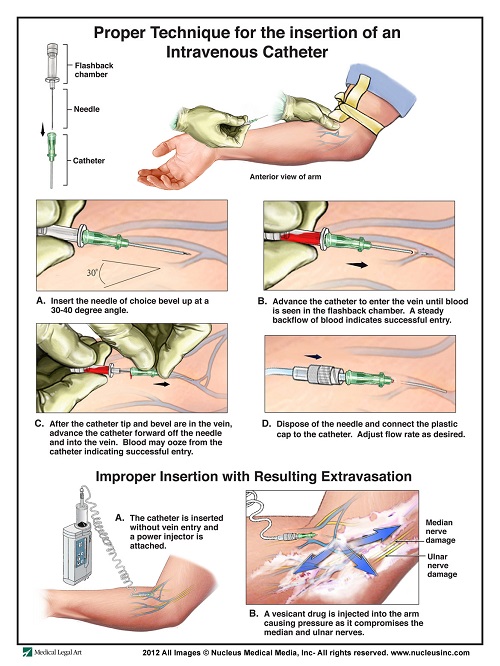
9Stick the needle in a 15 to 30-degree angle

Adjust your angle of approach according to the depth of your target vein. The common cause of blown veins is sticking the needle too deep.
10Insert the catheter directly on top of the vein
Avoid side access as it can push the vein sideways even if it’s anchored by your non-dominant hand. Inserting the vein catheter on top of the vein will also reduce the chances of it going through the two vein walls.
11Go slowly with catheter insertion
Give yourself plenty of time in estimating the angle of approach so you can avoid jerky movements. Hit the vein slowly but steadily and make a short stroke through the skin to reach the vein quickly.
Feel the catheter penetrate the vein. In some cases, you can even hear a small click-like sound and feel that you are getting a flashback.
12Once you hit the vein and see flashback of blood in the flashback chamber, STOP advancing the catheter and drop your angle of approach
This is necessary for avoiding puncturing the vein wall again. Drop your angle of approach as you advance the catheter a little bit more.
13Pull back the needle a little bit before advancing the whole catheter
The needle will serve as a guidewire as you push the catheter farther. You need to pull back the needle so there will be less chances of puncturing the vein again as you advance the catheter.
14Try not to use a tourniquet in elderly patients
Their veins are so thick but very fragile so just a little pressure from the tourniquet can blow a punctured vein. If you suspect that there is poor vein integrity but you can easily see and feel the vein in an elderly patient, try anchoring the vein and do not use a tourniquet.
However, if you can’t really palpate the vein, you can also try applying a tourniquet a little farther from your target vein.
15Improve the vein’s fullness by using gravity

Ask the patient to let his or her arms dangle on the side of the bed. The gravity will improve the vein’s fullness so you can palpate it easier.
16In elderly and chemo patients, try using a BP cuff as your tourniquet
With a BP cuff, you can control the pressure you want to apply. Start with the lowest pressure first and see if you can already make the veins appear.
It is best to use the lowest pressure possible so you can prevent pressure-related venous blow.
Take note that a tourniquet is still your better option in vein dilation.
17Once you have a flashback, release the tourniquet first
This is important in reducing the chances of pressure-related blowing of fragile veins. This trick works for large but weak vein walls.
You must be quick in releasing the tourniquet once you have ensured that the catheter is within the vein.
18When you have successfully inserted the catheter, start the IV infusion slowly
Rushing into starting the IV fluid might blow the vein wall due to the sudden large volume of fluid being infused. Just let the IV infusion start slowly especially if you are working with fragile veins.
19Don’t do “fishing”
If you don’t get a flashback, don’t make your needle go around digging for a good vein. It’s not only uncomfortable for the patient but it can also increase the risk of blowing up the vein.
Whenever you don’t get a flashback, just pull back the needle a little bit and redirect it. If you still don’t get a flashback, pull the needle out and start again.
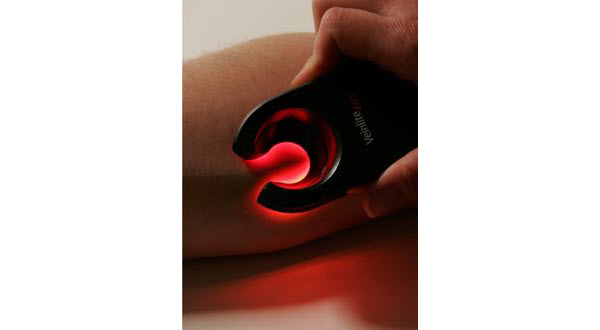
20If available, use visualization devices

This is a great help for patients with difficult veins so you could not risk blowing good venous access. There are many types of vein visualization devices around like transilluminator lights and pocket ultrasound machines. These devices can illuminate vein pathways so you can track the direction of where you should insert your IV catheter.
One More Tip!
As what most senior nurses say, once in a while you will experience a “dry spell” with venipunctures. If it’s not your day, let it go and ask for help from your colleagues.
You can also learn hard-to-explain IV insertion techniques by watching senior nurses do venipuncture. Always remember that there are lots of lessons to learn from other’s experiences!
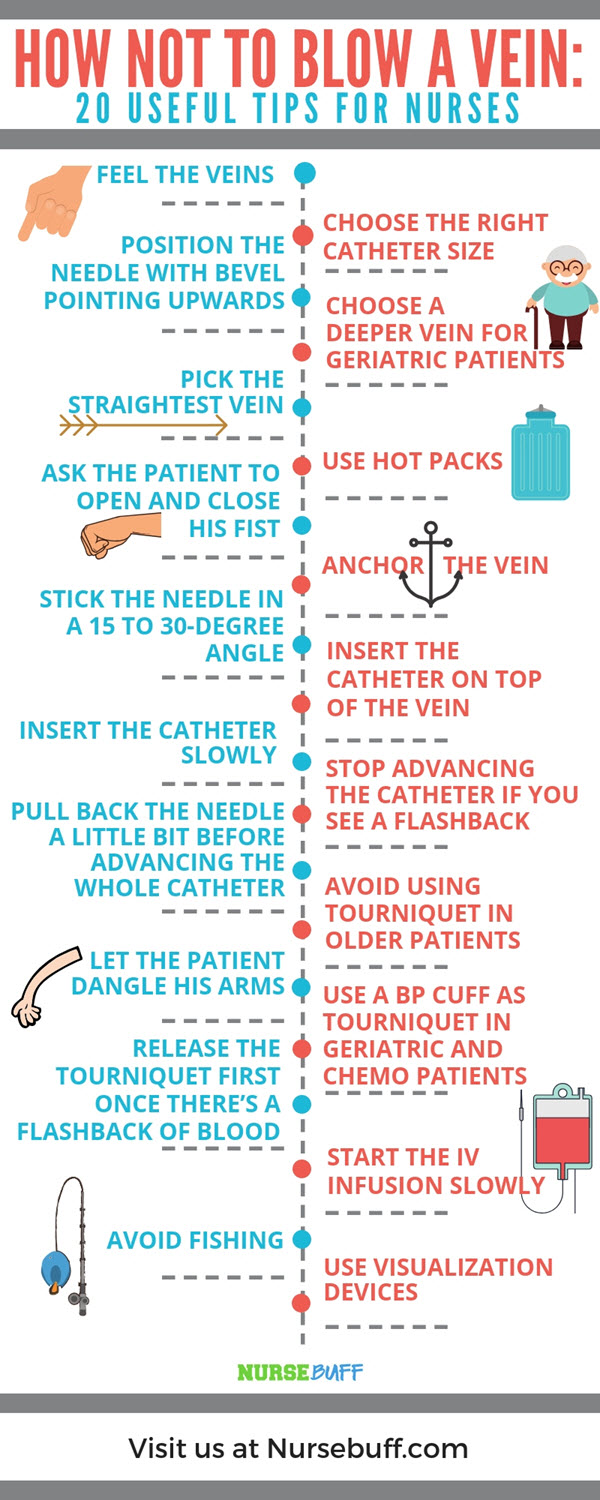
Check Out Our Infographic


